
Sub-Total: £0.00
A Shooter’s Guide to Air Pistol Sights & Scopes: How to Actually Hit What You’re Aiming At
Beyond Factory Sights: Unlocking Your Pistol’s True Accuracy
Let’s be honest: nothing beats an afternoon spent knocking down spent 12-bore hulls and spinning reset targets at the bottom of the garden. But if you’re finding that your pellets are landing anywhere except where you intended, the blame might not lie with your trigger finger.
Most air pistols arrive out of the box with basic, factory-fitted open iron sights. They work well enough to get you going, but a thick plastic front blade and a crude rear notch quickly become the biggest barrier between you and tight, repeatable groups.
Upgrading to a proper optic is the single fastest way to transform how your pistol shoots. Whether you’re trying to shave millimetres off your 10-metre club scores or simply want faster target pickup in the garden, here is what you need to know about choosing, mounting, and zeroing the right sight.
The 3 Pillars of Air Pistol Optics: A Comparison
Finding the right sight isn’t about picking the most expensive model, it’s about matching the optic to your shooting discipline, shooting distance, and eyesight.
Iron Sights, Red Dots, or Scopes: Which Sighting System Suits You?
There’s no universal “best” optic here—only the right tool for how you shoot. Match your kit to your eyesight, range, and intended discipline:
| Sighting System | Best For | The Good | The Bad |
| Open Iron Sights | Traditional 10m club target, pure fundamentals | Bulletproof, battery-free, forces textbook trigger control | Slow on target; wide front post hides small marks; poor in gloom |
| Red Dot / Reflex | Garden plinking, rapid-fire action, close pest dispatch (<10 yds) | Instant target acquisition; shoot with both eyes open; unlimited eye relief | Battery reliant; large dots cover small bullseyes; flares with astigmatism |
| Pistol Scope (LER) | Benchrest precision, card punching, ratting under cover | Crystal-clear magnification; mil-dot holdover; pinpoint pellet placement | Amplifies natural hand tremor; adds weight; needs low-distance parallax focus |
Iron Sights: The Foundation of Marksmanship
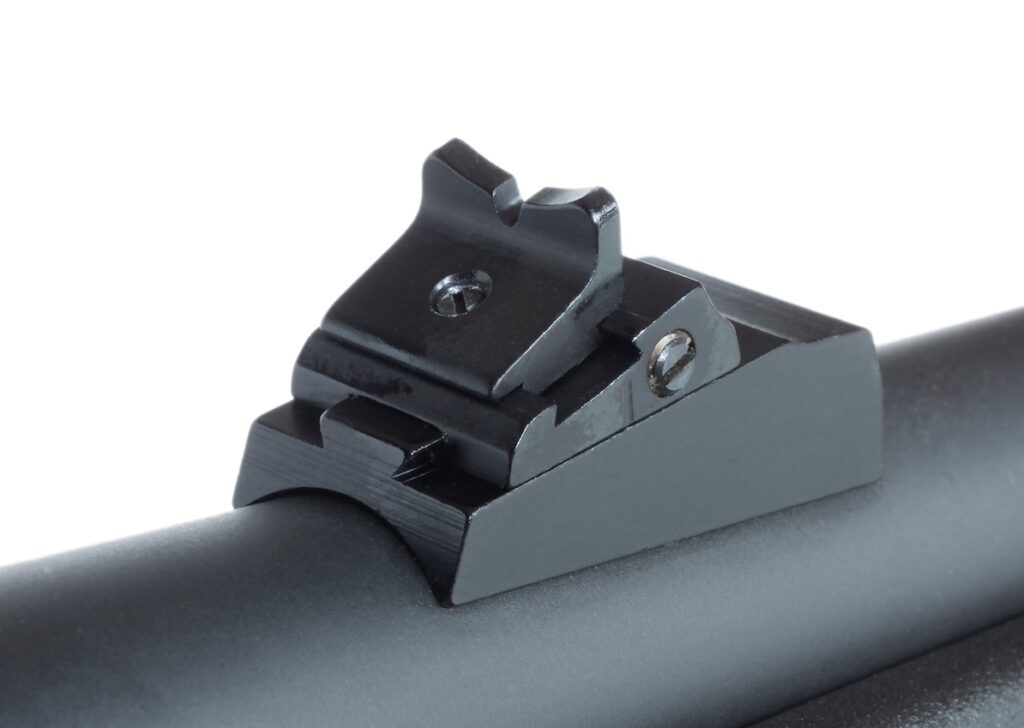
The traditional iron sight is the bedrock of shooting. Its principle is simple: align the rear sight, the front sight, and the target on the same visual plane. The challenge lies in the fact that the human eye cannot focus on all three points simultaneously. The correct technique req1. Iron Sights: Pure Marksmanship
Shooting well with standard irons comes down to geometry: lining up the rear notch, the front post, and the target downrange.
The human eye cannot focus on three different distances simultaneously. The correct technique demands that you focus sharply on the front sight post, leaving the rear notch and the bullseye slightly out of focus.
- The Upside: They never run out of battery, they handle rough weather, and they don’t add bulk. If you shoot in traditional 10m club competitions that mandate open sights, mastering them is mandatory.
- The Downside: Acquiring a target is slow. Worse, at 10 to 15 metres, a chunky front blade can completely blot out a 20mm target spinner, leaving you guessing where your pellet will land.
Red Dot & Reflex Sights: The Speed Kings
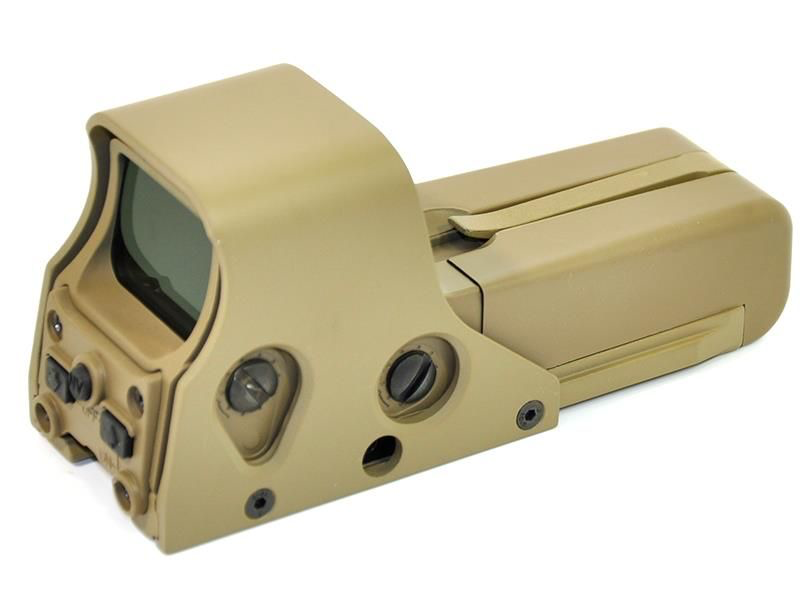
ACM 552 Scope with Red and Green Holographic Sight (Colour Box – Tan)
Instead of wrestling with three separate focal planes, a reflex sight projects a crisp illuminated dot onto an internal lens. The aiming method becomes entirely intuitive: put the red dot on the target and squeeze the trigger.
- The Upside: Fast, intuitive, and fun. Keeping both eyes open gives you complete peripheral awareness, making target transitions seamless on reactive steel plates or tin cans. They are also remarkably forgiving of head position, meaning you don’t need a rigid cheek weld.
- The Downside: They depend entirely on batteries—always keep a spare in your range bag. Shooters with an uncorrected astigmatism often see an irregular starburst or blurry smear rather than a crisp circular dot.
- Dot Size Matters: Red dot sizes are measured in MOA (Minutes of Angle). A chunky 5 MOA dot is brilliant for quick garden plinking, but it will cover half an inch at 10 yards, making it too fat for serious target-card work. Look for a 2 or 3 MOA dot if you want precision.
Huntsman Top Pick:
For ultra-fast target pickup without front-heavy drag, look at the ACM 552 Scope with Red and Green Holographic Sight or our ultra-compact ACM Tactical Mini Red Dot Sights.
Compact Magnified Scopes: Benchrest Precision & Carbine Setups
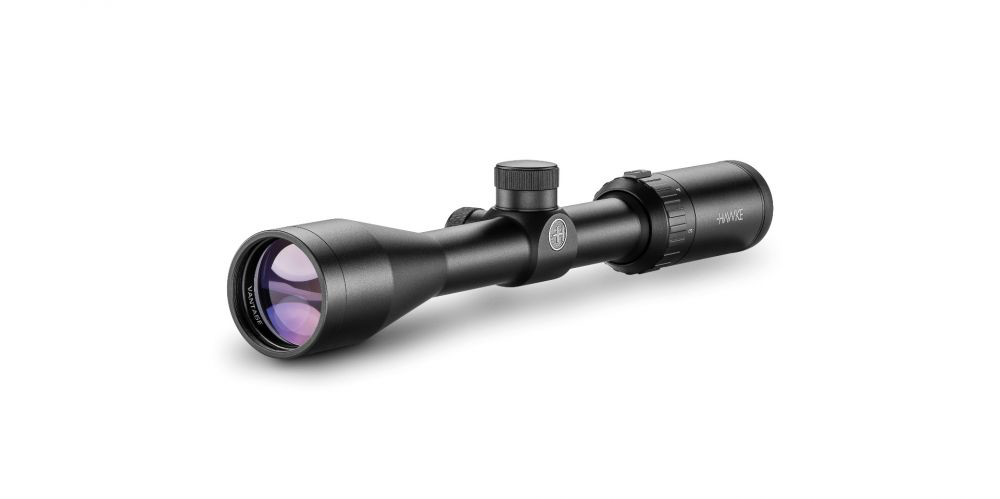
Hawke Optics – Vantage ~ 3-9×40
While red dots rule handheld shooting at arm’s length, standard compact magnified scopes are the go-to when you want pinpoint pellet placement from a rest.
Because standard compact scopes feature conventional rifle eye relief (typically 7 to 9 cm), they are designed for benchrest target shooting, two-handed rested positions, or air pistols fitted with a carbine shoulder stock—where your head sits naturally closer to the ocular lens.
The Upside:
- Surgical Clarity: Magnification brings small target cards and 10-metre bullseyes right up close, letting you spot pellet holes and refine your shot placement.
- Holdover Reticles: Mil-dot crosshairs give you precise reference points to compensate for pellet drop over varying ranges without touching your turrets.
- Stability on the Bench: Paired with sandbags or a pistol rest, a magnified optic eliminates aiming guesswork downrange.
The Downside:
- Not Built for Arm’s-Length Shooting: Standard scope eye relief requires your eye to sit within 3 to 4 inches of the rear lens, making them impractical for classic one-handed, outstretched shooting.
- Weight & Balance: A full tube scope and ring mounts alter the handgun’s centre of gravity, making a bench or rested support essential.
- Magnified Wobble: The higher your zoom, the more your natural hand movements are amplified. Stick to low magnification (3x–4x) if you’re not shooting from a fixed rest.
Featured at Huntsman Sports:
For dependable benchrest accuracy, card punching, and carbine conversions, the Hawke Optics Vantage 3-9×40 (Mil Dot) delivers crisp multi-coated glass and proven recoil resistance, easily mounted using our low-profile Dovetail-to-Picatinny Rail Adapters.
Discipline-Driven Choices for the UK Shooter
Aligning your choice with your primary shooting activity saves money and avoids frustration on the range:
- For the Garden Plinker: The clear recommendation is a Red Dot or Reflex Sight. Plinking is about reactive fun,and the speed, wide field of view, and intuitive nature of a red dot are ideal for transitioning between tin cans, chalk discs, and spinners.
- For the 10-Metre Target Shooter: Club target disciplines demand absolute precision. If competing in an “any sight” division, choose either a red dot with a small 2–3 MOA dot or a low-power magnified scope from a supported rest. A fine crosshair or compact dot allows for refined, consistent shot placement on scoring rings.
- For Close-Range Pest Control: When using an air pistol for controlling rats in tight barn environments, the choice sits between a rugged red dot for speed in tight quarters and a low-magnification scope for crisp identification in low light to guarantee a safe, humane shot.
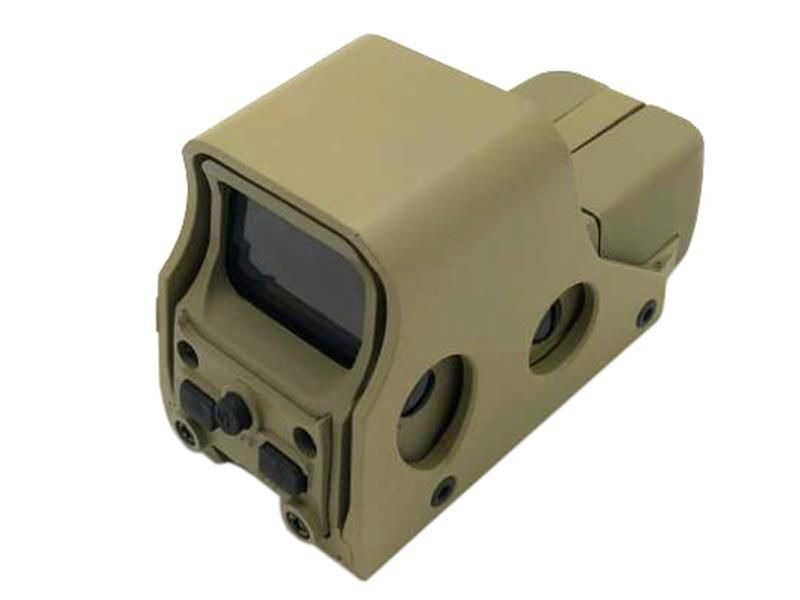
ACM 551 Scope with Red and Green Holographic Sight
Decoding the Jargon: What the Numbers Mean
The world of optics is packed with technical shorthand. Understanding these specs ensures you select the correct tool:
- Magnification & Objective Lens (e.g., 3-9×40): The first numbers (3-9x) indicate magnification power—making the target appear 3 to 9 times closer. The second number (40) is the diameter of the front objective lens in millimetres. Larger lenses transmit more ambient light for a brighter picture, but add weight and require higher mounting clearance.
- The Parallax Factor: Parallax is an optical effect where the reticle appears to drift across the target if your eye moves off-centre from the eyepiece. This occurs when the target image and reticle do not sit on the exact same focal plane. Standard rifle scopes are factory-set parallax-free at 50 or 100 yards; using them at 10-yard air pistol distances can cause frustrating, unexplained misses. For close-range precision, select scopes featuring an Adjustable Objective (AO) or Side Focus (SF) to dial focus right down to close distances.
- Reticles & Dot Sizes (MOA): Scope reticles range from clean Duplex crosshairs to Mil-Dot designs featuring evenly spaced reference dots for elevation holdover. For red dot sights, dot size is measured in Minutes of Angle (MOA). 1 MOA covers roughly 1 inch at 100 yards, which scales down to approximately 0.1 inches at 10 yards. A 2–3 MOA dot provides pinpoint precision on small targets, while a 5–6 MOA dot allows rapid, instinctive acquisition for plinking.
Mounting Systems: Dovetail vs Picatinny/Weaver
A high-performance optic will fail if the mounting foundation is flawed. Air pistols rely on one of two rail systems:
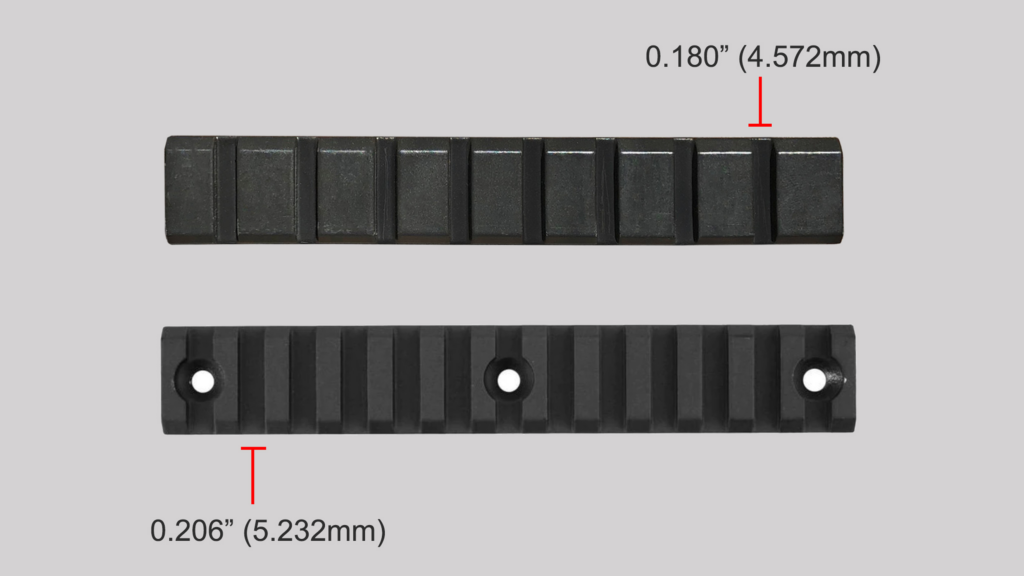
- 11mm Dovetail Rails: The classic standard on British airguns. It consists of two parallel grooves machined along the top of the action. While slim and low-profile, smooth dovetails can occasionally suffer from “scope creep” under mechanical recoil. Some European airguns (such as older BSA or Gamo models) feature 13mm rails, requiring matching mount clamps.
- 20mm Picatinny / Weaver Rails: The modern tactical standard featuring crosswise recoil slots. Cross-bolts lock firmly into the slots, completely preventing forward or rearward movement under recoil and allowing optics to be swapped with reliable return-to-zero.
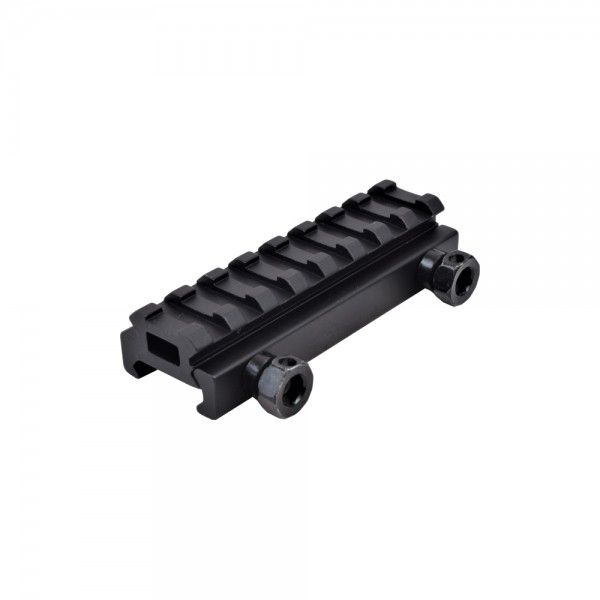
Fitter’s Tip: If your air pistol features standard 11mm dovetails but you wish to fit a tactical red dot, use a low-profile ACM Dovetail to Weaver/Picatinny Rail Adapter to convert the rail cleanly without adding excess height over bore.
For shooters with a dovetail-railed pistol who wish to use a Picatinny-based optic, simple and affordable adapters like the ACM Dovetail to Weaver Picatinny Rail Adapter are available, providing a secure and versatile solution.
Step-by-Step Installation Guide
Poor groupings after fitting a new optic are almost always down to minor mounting errors rather than mechanical faults. Follow this meticulous installation process:
- Safety First: Ensure the air pistol is completely unloaded, uncocked, and pointed in a safe direction.
- Mount the Bases: Separate the top and bottom ring halves. Loosely fit the base clamps to your pistol’s rail. If using dovetail mounts with reversible clamping plates (e.g., 9mm/11mm options), ensure both plates face the correct orientation so the mount sits upright.
- Position for Eye Relief: Rest the scope tube in the lower rings. Assume your shooting stance and slide the scope forwards or backwards until you see a complete edge-to-edge sight picture without black crescent shadows (vignetting). Lightly secure the base screws.
- Level the Reticle: If your vertical crosshair is canted (tilted), your pellets will drift left or right whenever shooting at distances other than your zero range. Place the pistol in a secure rest, sight through the optic at a plumb line or level vertical door frame, and rotate the tube until the vertical hair aligns with gravity.
- Final Tightening: Replace the top ring caps. Tighten the screws gradually in a diagonal “X” pattern, turning each screw half a turn at a time to apply uniform clamping pressure. Do not over-torque, as crushing the tube can bind internal elevation and windage mechanics. On recoiling spring pistols, a small drop of removable thread-locker on screw threads prevents vibration shake-out.
The Art of Zeroing: Aligning Sight with Impact
Zeroing aligns your optical point of aim (where the crosshair points) with your physical point of impact (where the pellet strikes) at a set range.
Preparation
- Choose a Realistic Distance: 10 yards is the standard starting baseline for UK air pistol target shooting and garden plinking.
- Use a Solid Platform: Always zero from a supported benchrest or sandbags. You are isolating the gun and optic’s mechanical alignment, not testing your freehand steadiness.
- Check Your Backstop: Ensure your backstop is thick steel, solid timber, or a dedicated pellet catcher placed against a safe, impenetrable wall.
The Zeroing Process
- Shoot a Group: From your benchrest, aim dead-centre at a fresh paper target card and fire a careful group of 3 to 5 shots. A group reveals your true average point of impact far better than a single pellet.
- Measure the Offset: Note where the centre of your grouping lies relative to the bullseye (for example, 1 inch low and 1.5 inches right).
- Adjust the Turrets: Remove the turret caps to expose the dials:
- Elevation Turret (Top): Controls up/down. If your group is hitting LOW, dial in the direction marked “UP”.
- Windage Turret (Side): Controls left/right. If your group is hitting to the RIGHT, dial in the direction marked “LEFT”.
- Confirm and Refine: Fire a second 3-shot group. The pellet cluster should shift directly towards the centre. Fine-tune your clicks until your groups consistently punch out the bullseye.
From Good to Great: Honing Your Aim
With a properly mounted and zeroed optic, the hardware is no longer the limiting factor—the final variable is the shooter. An advanced sight cannot compensate for flaws in fundamental technique.
Beyond the Gear: Correcting Common Shooting Errors
Once your optic is mounted and zeroed, the hardware is dialed in. The remaining variable is marksmanship technique. Watch for these common pitfalls:
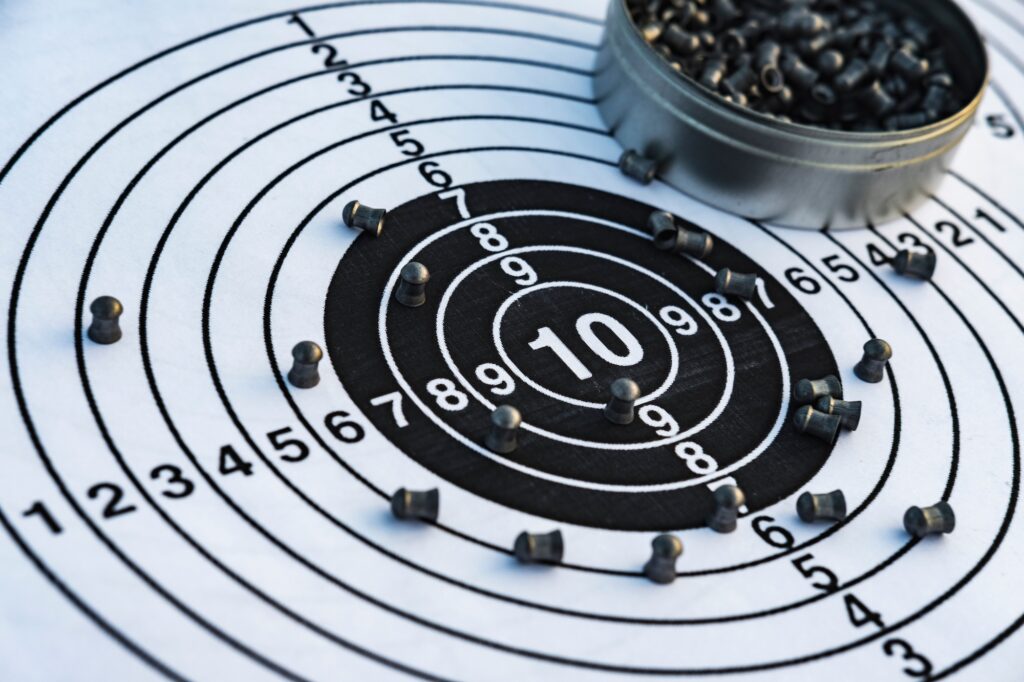
- Inconsistent Grip: A white-knuckle squeeze induces muscle fatigue and tremors, while a loose hold allows the pistol to jump inconsistently during the shot cycle. Maintain a firm, relaxed handshake pressure that remains identical from the first shot to the last.
- Snatching the Trigger: Yanking the trigger pulls the muzzle off target a split second before the sear breaks. Apply smooth, progressive, rearward pressure with the pad of your index finger until the shot breaks cleanly.
- Anticipating the Shot (Flinching): Pushing the muzzle down and forward just as the shot breaks is a common subconscious reaction to noise and recoil. Use the “ball and dummy” drill: have a shooting partner load either a live pellet or leave the chamber empty without you knowing. When you pull the trigger on an empty breech, any flinch will instantly reveal itself.
- Neglecting Follow-Through: Never drop your shooting arm the instant the pistol fires. Maintain your grip, stance, and sight picture for half a second after the pellet leaves the muzzle. Dropping your hands prematurely is the leading cause of low-striking flyers.
Airgun Safety: The Cardinal Rules
Air pistols are precision sporting tools and must always be handled with strict firearm discipline:
- Treat every air pistol as if it is loaded and cocked.
- Never point the muzzle at anything you do not intend to shoot.
- Keep your finger off the trigger and indexed along the frame until your sights are on target and you have made the decision to fire.
- Always verify your target, your immediate surroundings, and what lies behind your backstop.
Matching the right sighting system to your pistol—whether that is a rapid-fire red dot, robust iron sights, or a precision benchrest scope—completely transforms your confidence and consistency on the firing line.
Explore the complete range of air pistol sights, magnified scopes, and mounting rails at Huntsman Sports to upgrade your setup today.
Frequently Asked Questions: Air Pistol Sights & Scopes
- Can I mount any standard rifle scope directly onto an air pistol? Standard rifle scopes feature a short eye relief (7–9 cm), which requires your eye to sit close to the ocular lens. They work well for benchrest shooting, two-handed rested positions, or carbine builds with a shoulder stock. However, for classic one-handed, outstretched shooting at arm’s length, standard rifle scopes will present severe black tunnelling (vignetting); unmagnified red dot or reflex sights are the correct choice for full arm extension.
- What distance should I zero my air pistol at in the UK? 10 yards (approx. 9.1 metres) is the industry-standard zeroing distance for UK back-garden plinking, club target cards, and close-range pest dispatch. It aligns closely with standard UK target competition ranges and provides a flat, predictable trajectory for most .177 and .22 calibre air pistols.
- How do I know if my pistol uses an 11mm Dovetail or 20mm Picatinny rail? Look at the top receiver of your pistol:
- 11mm Dovetail: Features two smooth, continuous parallel grooves machined straight into the cylinder or top frame without cross-slots.
- 20mm Picatinny / Weaver: A wider, raised rail with distinct perpendicular cross-slots running across the top.If your pistol has an 11mm dovetail, a low-profile Dovetail-to-Picatinny adapter can convert it for tactical red dots.
- Why does my red dot look like a blurry starburst instead of a round dot? This is almost always caused by an uncorrected astigmatism in the shooter’s eye rather than a faulty LED emitter. To check, look at the red dot through your smartphone camera: if the dot appears crisp and round on screen but flared to your naked eye, your eye is refracting the light irregularly.
- What dot size (MOA) is best for air pistol target shooting? For formal card punching or precision target shooting, choose a small 2–3 MOA dot so the reticle does not obscure the inner bullseye at 10 yards. For fast garden plinking on reactive steel plates, tin cans, and spinners, a larger 4–6 MOA dot allows faster, instinctive eye acquisition.
- Why is parallax adjustment (AO) necessary for close-range shooting? Most full-size rifle optics without parallax adjustment are factory-set to be parallax-free at 50 to 100 yards. When shooting at 10 yards, moving your eye slightly off-centre causes the reticle to wander across the target image, leading to unexplained misses. An Adjustable Objective (AO) allows you to mechanically dial the optical focus down to close range, eliminating aiming drift.
Check out our articles on:
How to maintain your air pistol .
Discover the top 5 air pistol FAQs in the UK.
Discover the top 3 glock air pistols .
Discover the best spring-powered air pistols .
Discover the best PCP air pistols .
How to choose your first air pistol.
Discover the best air pistol for rats.
How to improving air pistol accuracy.
Discover the best air pistol scopes and sights.

